Help / Screen Pattern by Printing Process
Visualization of Screens According to the Printing Process
Here we present a very detailed comparison of how our printers or imaging devices reproduce your image in a print. For example, in the case of a pigment printer, how the distribution and density of the different ink dots are managed on a given paper surface. This "printing screen" is linked to the technology used by the printing process (printer, imager).
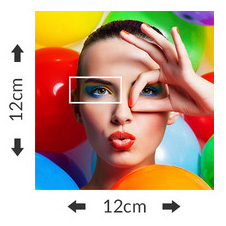
Important: Rest assured, when viewing an entire print, like our 12x12 cm print shown here, the printing screen is not visible to the naked eye! However, the structure of the screen contributes to the perceived sharpness of the print. Depending on the printing process, your print may therefore subjectively appear according to your preference: sharp, not sharp enough, or too sharp.
In detail, using a high-definition scanner, we scanned the same 12x12 cm print produced with our different color and black-and-white printing processes: silver-halide imagers (Durst Lambda, Fuji Frontier), inkjet printers (Epson), large-format printers (Swiss Q Nyala, Swiss Q Kudu, Epson R5000L, Epson S80600L).
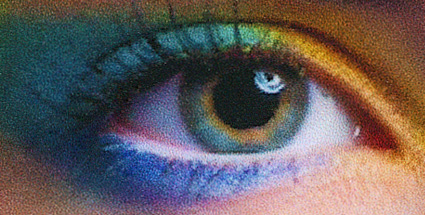
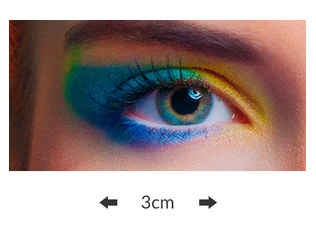
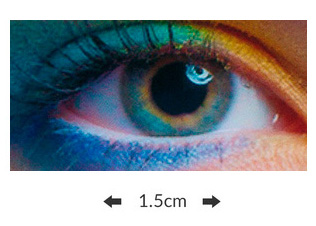
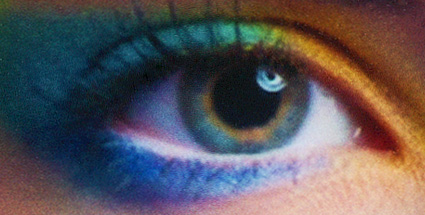
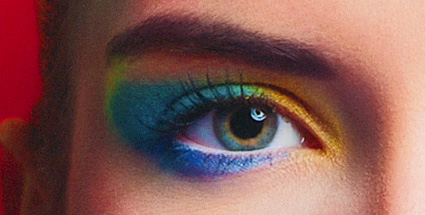
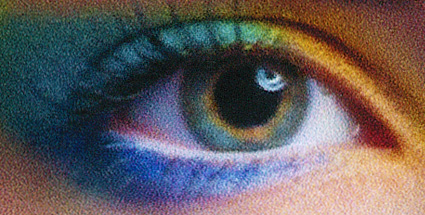
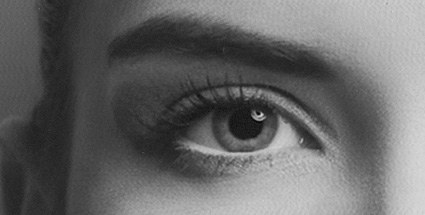
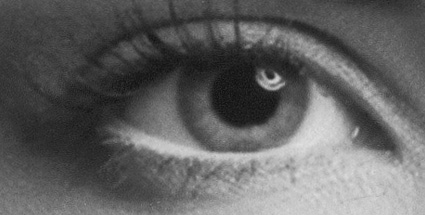
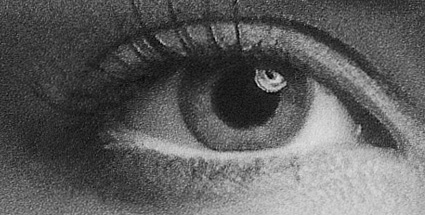
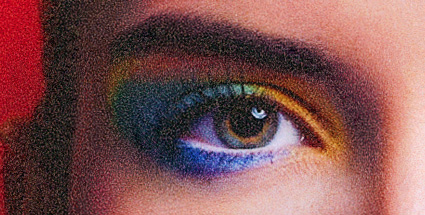
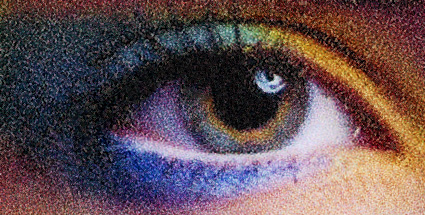
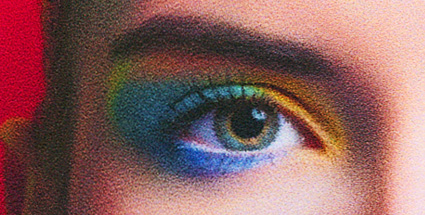
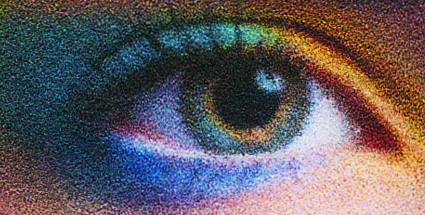
We extracted the same detail, the eye on the left side of the face, to highlight the rendering of the screen for each printing process: this detail corresponds to 3 cm in length and 1.5 cm in length on the 12x12 cm print.
Enlargements made from scans of prints produced with our different printing processes.
Imager:
DURST Lambda

Imager:
FUJI Frontier
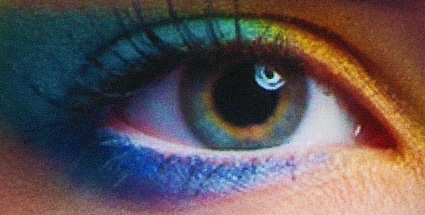
Printer:
EPSON P20000

Imager:
DURST Lambda
Printer:
EPSON 9900

Printer:
UV SWISSQ KUDU
Printer:
RESIN EPSON R5000L
Printer:
ECO-SOLVENT EPSON S80600L